- Epicurious Essentials: Cooking How-Tos
- Wedding Cakes
- Episode 4
Piping Swag Decoration
Released on 11/11/2008
(lighthearted music)
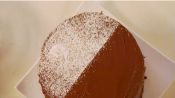
Hi, I'm gonna demonstrate a do-it-yourself wedding cake.
So now we've got our cake all assembled
and we've got the teardrops between each tier
to make a nice close to seam.
Now it's time to decorate.
So we're gonna put some swags draping along the sides.
So before we start, we just have to measure that out.
You don't actually need to use a ruler here,
although you can if you're careful,
but it's almost better to eye it at this point
because you don't want to make any marks
on the finished frosting.
So I'm just gonna start really anywhere
as a starting point and put a dot.
These dots are not gonna wind up showing at the end.
The flower's gonna go on top.
But we're just using it to mark.
So go directly across from that for your other one
and then just turn it slightly
and center between the two
and then down here.
On the next tier, I'm going to do the same thing,
but I'm gonna offset it in between the two dots.
So the first dot will be right there in the middle.
So I'm gonna start always working in front of myself.
Right there.
So I'm just marking this tier into quadrants
using these two dots as a guide.
Center of that one goes straight down.
There.
And again, center of that, go straight down.
There.
So you can see already it's nice and even.
Now I'm gonna go do that again on the bottom tier.
Use the top as a guide or between these two here
and that would be there.
So we have dots here, in the center, and then again here.
12 o'clock, six o'clock, three o'clock and nine o'clock
on each tier.
Turn 45 degrees for the next tier
and then back for the next tier.
Now we're almost done measuring.
The last part you actually have to
really be careful measure is the point,
the lowest point of this swag.
I find the easiest way to do this is
I use my knuckle of my thumb
and I'm gonna use this as a guide,
this bottom dot here as a guide
and almost touch, put the bag right at the bend of my thumb
and put a dot there.
So if you don't like any of the dots that you've made
and your cake is cold, you can easily scrape it off.
But the cake needs to be cold
otherwise it's a little more difficult
and then just go right over it.
Don't worry if there's a very minor flaw.
You won't notice it when the cake is finished.
So when I'm ready to do my swags,
these are the two points I'm gonna connect.
Just remember that you're gonna keep it on a curve
and just space them evenly apart
and make sure the dots are the same size as each other.
And when we go up the other way, same thing,
keep it in front of you so you can see your curve.
So when you do this tier,
you're just gonna open the angle a little bit.
I'm just connecting the dots.
Okay.
Again, up.